Showing posts with label DIY. Show all posts

Wednesday, October 19, 2016

Cottage makeovers

Rearranged and deep cleaned the whole kitchen to this sign (which Mom gave me for my birthday) would be the first thing you see when you come in the kitchen door.

Hallway:
Yowza!


Kids room:

Voila! 


Lisa gave me some decorations after her wedding and I made this princess throne canopy for Darcy's bed. 

His and hers closets with a common area in between. 


Master Bedroom:

It's pink before and pink after, but believe me in person there is a big difference. 


Gallery before

Small gallery wall #1 after


Gallery wall before

Small gallery wall #2 after

The view from my bedroom window. I have a weird window that actually opens onto the porch, but the porch is basically all windows, so I still get natural light and a great view of my hydrangeas and the lake. Although you can't tell here, my window is freshly painted white! 


Thursday, September 22, 2016

May 14, 2016

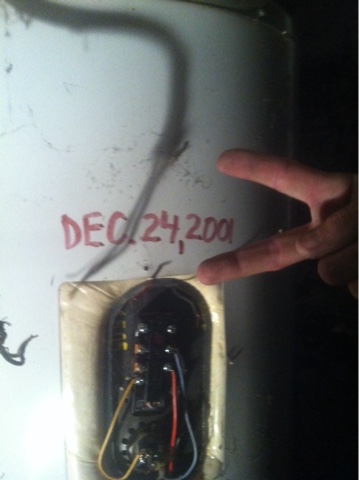
Just another Saturday night...without hot water. Yup, our hot water tank finally gave up tonight, just what we needed. Kevin is just starting to get some work, after being laid off for over 6 months and I M getting less work and then this.  We can't ever just have smooth sailing for a few weeks...

Thankfully Mom to the rescue! She had a good, nearly new tank in her basement which we could have  immediately and for a very good price. As a bonus Darcy got to stay at Nanna's for a sleepover when we went to get the tank.

We got up there, tank out of the basement and loaded into the back of pick up by 8:30 only to discover we locked the keys in the truck. Oh, but I had a spare key in my purse! My purse was in the truck. Which was locked. Really???

We managed to keep cool and figure out a way to break in without actually breaking anything.

Then home to install our new tank.


A lovely place to work! 


We were still luckier than the last guy:

Monday, June 6, 2016

Homemade ice cream

I love it when I make something for the first time and it actually turns out the way I expect. This ice cream turned out exactly the way I wanted it...amazing!


Monday, May 16, 2016

Playroom make-over


I used posters and framed photos to cover the damage on the walls in the playroom. it worked so well I was a bit shocked when I took everything down to paint, LOL! 


It took a few days to plaster and sand the cracks and holes and 2 days to paint.

I painted the celing on a Sunday when I had the use of Kevin's step ladder. The next day when I went to cut in around the top of the ways with my two-step ladder, I realized the celings are 9 feet!! On my tip-toes, arm fulling extended and holding the brush near the tip of the handle, I managed to do the trim. Luckily I have a steady hand! 
      Before and after. 

My mother-in-law had a gallon of light blue left after she painted her kitchen last summer and she gave it to me. The walls were already blue, so I didn't prime. I used the left over beige paint from Darcy's room to do the ceiling, baseboards and window sills. The window frames are slated to be stripped and varathaned this summer. I used leftover grey Tremclad from the clawfoot bathtub to do the heat grate. All I had to buy was the polyfilla! 

Heat grate. It had been painted silver by a previous owner, but was peeling badly. 


Before and after. Before: there was a weird band of white around the top if the walls. 


I painted the red bookshelf with dark blue paint left over from my dad's cottage...circa 2001...now that's good paint to stay good for 15 years!!

Finished room. 

Gallery wall. 


Chandelier update

Kevin has always hated this 70's style chandelier in our kitchen. I have always quite liked it, but agreed it lacked a little something. I finally decided to just give it a go and painted all the gold colored bits with Gloss black Tremclad paint. 

I took down all the crystals and cleaned them (which I do every year), but I put less back up.

If only the glass was clear glass instead of amber it would be perfect.


Sunday, March 13, 2016

Guinea pig cuddle cup DIY

Colby got a guinea pig for his birthday and Kevin really wanted to give him something for his guinea pig, so I made Ruby a bed.

I used this tutorial:


I had a little trouble with the size of the circle at the bottom vs the piece that wraps around to make the wall. I should have trusted my instincts when I thought that the wall should be about 3x the diameter of the bottom, but I figured there was a reason for the measurements given. I ended up just sewing the wall a little further inside the circle so it fit correctly and trimming after. Save yourself some trouble and use pi.

Finished product.

Colby and Ruby are happy!


Value of your craft

I found this online via one of the sewing/quilting pages I follow. Very informative, especially if you've never tried to sew something. I usually make rag quilts or at least have the outer edge rag-style (fringe) and thus there is no binding, so that saves me a lot of time.

I found this video by Make Something with a simple technique to price your work:

I still find it hard to price things! 

Monday, January 11, 2016

Jean pocket wall organizer

Y
I made this jean pocket wall organizer for my Goddaughter. I hope it will help her organize her craft and sewing supplies in a way that is easy to use and keeps her supplies within reach.

I made myself a square template and if the pockets weren't big enough I sewed some denim on the short sides. There were two that were too small on all sides, so I appliqued them onto a square the right size. 

The next step was to sew the squares together. I made three rows of three squares, then sewed the rows together. 

I used a soft, pale blue fleece for the back. I wanted something soft so it wouldn't scratch the wall and something without a lot of color so there wouldn't be any color transfer to the wall. I sewed on the two rod pockets before attaching the backing to the denim. The back was sewed on with front and back pieces right-side to right-side, leaving a small opening to turn it right side out. I used a ladder stitch to close the gap.

When I put the rod in and held it up, the denim sagged in the front...OH NO!!!!

Solution? I sewed (think quilting, but without the batting) along all the seems of the denim squares and all around the outside, about 1 inch in from the edge. This prevented any slipping and sagging of the pockets. 

The total finished aize is about 24"x 24".


Saturday, November 14, 2015

Mom's new garden and path


2015 BEFORE: looking up from the house towards the garage and the road. You can still a pile of shingles, some building materials tarped beside the garage, and piles of leaves. The siding was not on sides and back of the garage yet. I had begun laying out the edges of the path with stones.

2015: here is a "before" picture. I say that in quotations as this is an intermediate before. This picture is looking down towards the house from the road. That is the corner of the garage on the right hand side. The siding has been added to the sides and back of the garage now. The building materials and leaves have been removed.


Aug 24, 2016: My mom's birthday gift this year was this arbour for the garden path. I made it myself! My very first solo carpentry project! There are roses planted on either side, but they are still quite small.

Here was my work station in the driveway. Now we are looking up towards the road from the driveway near the house.

My helper on stand-by, petting Lovey. You can see the Franklin, which we cleaned and painted last year. 

Franklin at night.


The arbour from the other side. 


The path at dusk with lights on. 


A Blue Jay on the bird bath just outside Mom's dining toom window. 


Mom's brown-eyed susans. Darcy is pointing out a double-headed one! 

A different perspective

Pretty! 


Sunday, June 21, 2015

Office update

Before...the paint job that was done for Cam's nursery in 2004. The paint is very faded. Kevin removed the disfunctional wall sconces and put in a ceiling light for me. I patched the holes in the walls. The new window was installed in September. I still have to finish stripping the original window casing. 


This office/guest room update was mega low budget. The new ceiling light was a gift from a friend. The beige paint was left over from Darcy's bedroom. I mixed all the leftover blue paint together and love the results! I had just enough gloss white left to do the chairrail. I also had enough flat white to do the ceiling. The pink on the door is left from the bathroom reno 2 years ago. The blackboard paint is left from making Darcy and Cam's blackboards in their rooms. 

Darcy's corner. 


My gallery.


New deck

Going...

Rotten!


Done!!!